Ledger Hardware Support Comes to Ordinals with Xverse
Xverse, the leading Bitcoin wallet for Web3, is pleased to announce the integration of Ledger hardware support for Ordinals and BRC20 tokens.
Story details
Topics
Author(s)
Daniel BowdenPublished
July 21, 2023
Sign up for updates!
Stay tuned to our latest news and updates
.svg)
Ledger hardware wallets have garnered trust and acclaim from millions of users worldwide. Now for the first time, Ordinals and BRC20 holders can safely store their assets in Ledger devices with Xverse, extending the highest level of security to the burgeoning community of Ordinals enthusiasts.
NOTE: The development of Bitcoin ordinals is still in its early stages and, therefore, it is advised that only advanced users with a solid understanding of UTXO management should store and manage ordinals using their Ledger device. Further information on UTXO management can be found at the following links: here and here. In addition, it is important to note that transferring ordinals still carries the risk of potential loss and should only be undertaken at your own risk.
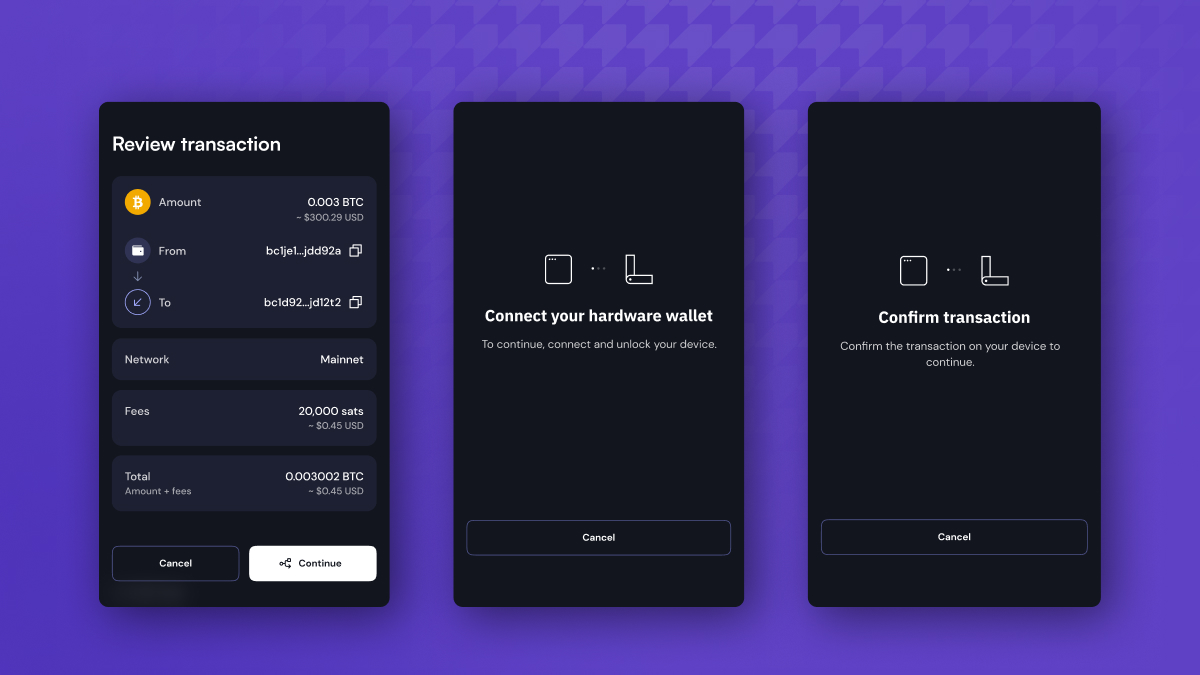
You can start using Xverse with your Ledger device in just a few steps. Here’s a quick guide:
How to Connect Your Ledger Device to Xverse
Step 1
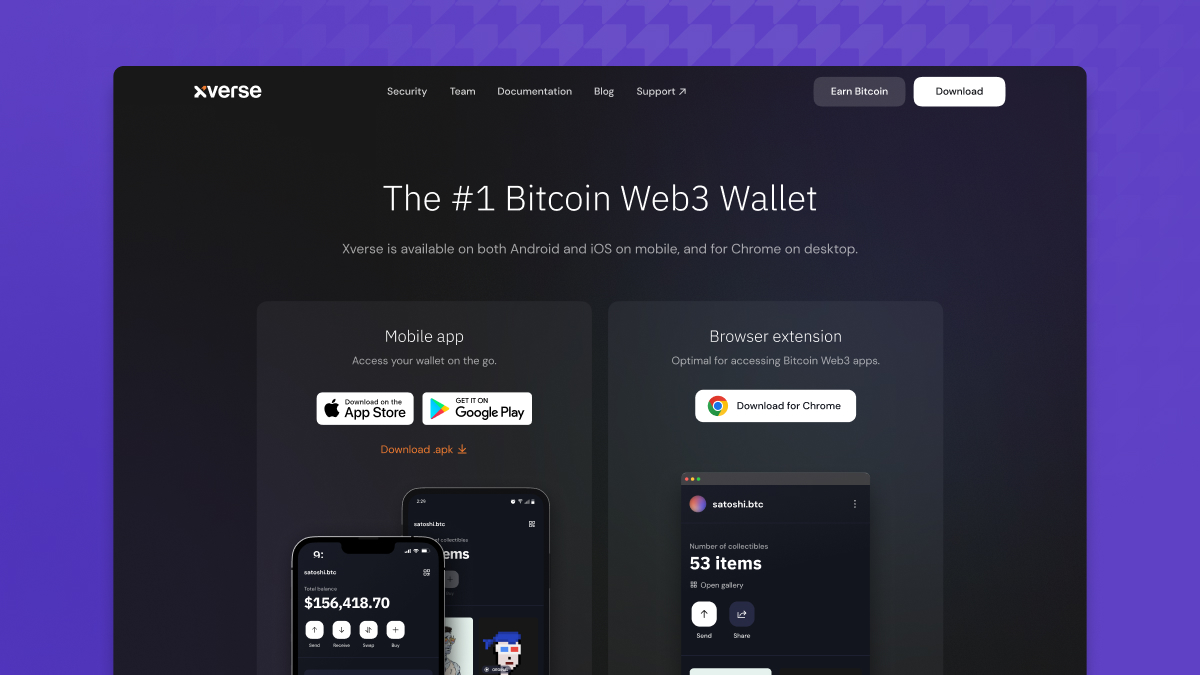
Download the Xverse Chrome browser extension: www.xverse.app/download. Xverse is the leading wallet for Bitcoin Web3, enabling users to connect to apps, safely store and send Ordinals and BRC20 tokens, earn BTC rewards with Stacks, and soon enjoy instant payments with the Lightning network.
Step 2
Create a new hot wallet and select Connect Hardware Wallet, ensuring your device is unlocked, connected to Bitcoin, authorized by your browser, and updated to the latest version.

Step 3
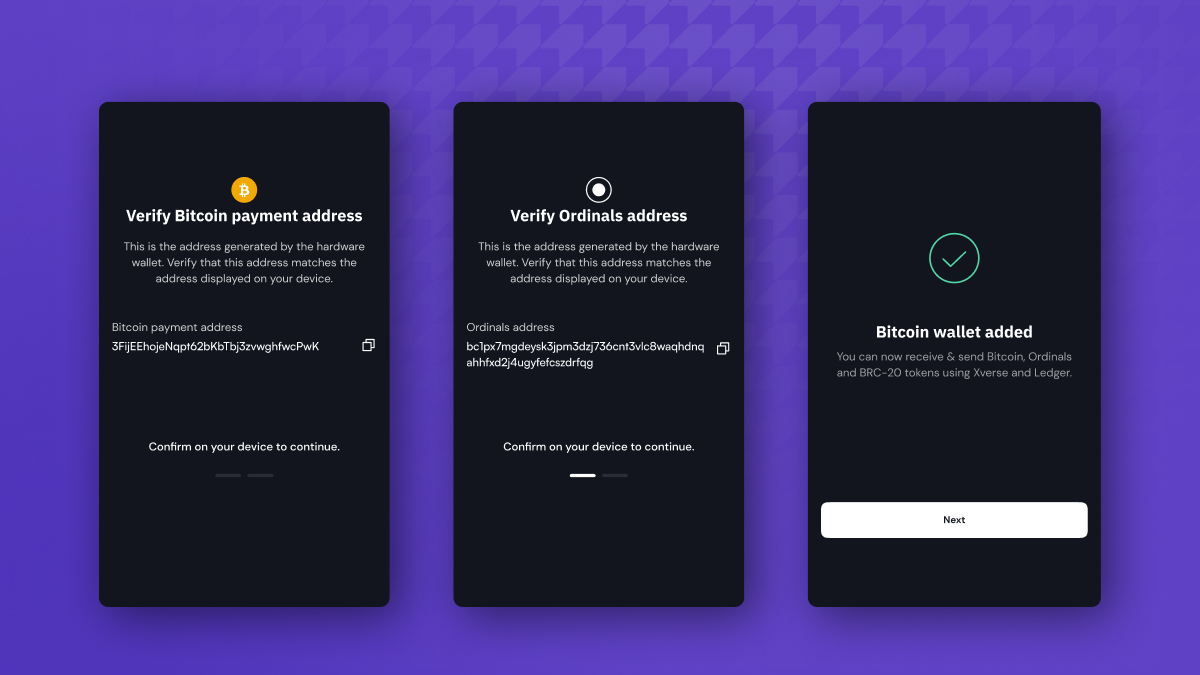
You will be given a Bitcoin payment and Ordinals address to add to your wallet, generated by your Ledger device. Confirm the addresses to continue.
⚠️ Use a dedicated Ledger device for your Ordinals. Avoid using Ledger Live and other wallets that are not ordinals-aware with the same device. Learn more here.
Step 4
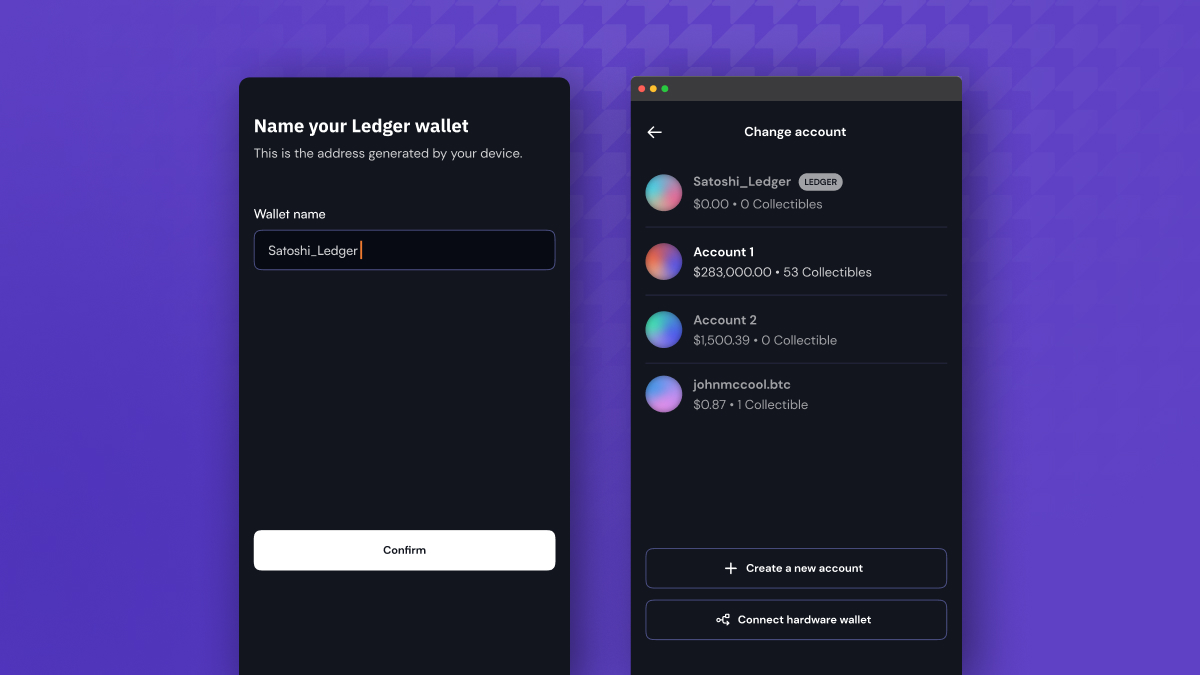
Next, you’ll have the option to name your account, which will appear at the top of your account list with a small “Ledger” icon next to it. That’s it!
Step 5
Ready to send a transaction? Prepare the transaction using your Ledger address. Connect and unlock your Ledger device, and confirm the transaction.
The ordinal transfer is from the ordinals address, and the transaction fees are paid from the BTC payment address. Ledger only allows signing of the transaction for 1 address at a time. For this reason, you will need to confirm twice, as you are signing the ordinal transfer and the transaction fee payment separately.
Questions? Visit our support desk to browse FAQs, read our latest updates, and effortlessly submit a ticket to our support team. We’re here to help!

.svg)

Related articles
The 10 Best Bitcoin Staking Apps in 2026: How to Earn Yield on BTC Without Selling It
Bitcoin yield is no longer theoretical. In 2026, you have ten live platforms offering everything from conservative 1% staking to aggressive 11% DeFi strategies. This guide evaluates every major method of earning on your BTC: L1 timelocks, liquid staking, Proof of Transfer, and more.
Best Onchain Neobanks in 2026: Bitcoin, Stablecoins, and Self-Custodial Banking Compared
Compare the 10 best onchain neobanks in 2026 across Bitcoin-native, multi-chain, and stablecoin categories. Self-custodial banking, crypto cards, DeFi yield, and BTC-backed borrowing. If you hold Bitcoin and want to actually use it, the list starts here.
Why Bitcoin Privacy Matters & How Starknet Makes It Possible
Bitcoin is pseudonymous, not anonymous. Every transaction is permanently public, and chain analysis firms can link addresses to real identities. Starknet's new privacy upgrade lets users shield any Starknet token, including strkBTC, for private Bitcoin transactions and balances.


